We decided to turn a neglected pergola in the corner of the garden into a simple gazebo, in order to create an ‘outside room.’
It has a wonderful view of the garden.

The view from the pergola along the back border. Sadly, the view of the pergola was less attractive.
But it was at the other side of the garden, so we had to take cushions, books, etc out there every time we used it. As a pergola doesn’t have a weatherproof roof, we couldn’t leave much out there.

If you look at the far corner of this picture, you can just see the pergola. It’s not far to take cushions and books, but it’s easy to forget to take them back, and if it rains…
It meant we hardly ever sat there. So we wanted all-weather ‘outside room’. Without spending much money.
I fell in love with corrugated iron sheds when we were in Australia. My brother-in-law, Richard, has just moved there,. He was told that ‘you can’t consider yourself an Australian man until you can work with corrugated iron.’

Inspiration from Australia – horticulturalist and TV presenter Stephen Ryan’s beautifully simple woodshed with wooden sides and a corrugated iron roof.
So he offered to add a corrugated iron roof to our pergola to turn it into a gazebo (a gazebo is a pergola with a roof. It can be a tent or permanent).
Can you use the original pergola?
Richard decided to use the original pergola as a structure for the gazebo. There were struts across the roof, sticking out. He removed these and reworked them into a simple rectangular frame, to which the corrugated iron could be screwed.
See the struts sticking out? It would be difficult to attach corrugated iron evenly to them.
However, that will depend on what condition the wood is in. Although our pergola is probably more than 20 years old (it was here when we bought the house), it’s made of cedar, so is long-lasting (and nicely weathered). Richard thought it was worth re-using.

Instead of struts across, there is now a square frame for the corrugated iron to sit on.
Now for the corrugated iron roof
I’d originally thought of buying recycled corrugated iron, but couldn’t find any I liked. And when I photographed garden maker Posy Gentles’ shed, she’d used a curved new corrugated iron for the roof. It almost disappears, as you can see from the photograph below.

Posy Gentles’ homemade shed has a curved corrugated iron roof. So we decided on curved corrugated iron.
We ordered it from Southern Sheeting. You need to measure the width and length of the roof, and how high you want it to be. Don’t forget to take any overhang into account. They delivered 5 sheets cut to order. We gave them 2-3 weeks notice.
The next stage
Richard then added a central beam to support the roof, at the top of the curve. He bought a strong new piece of wood for this.

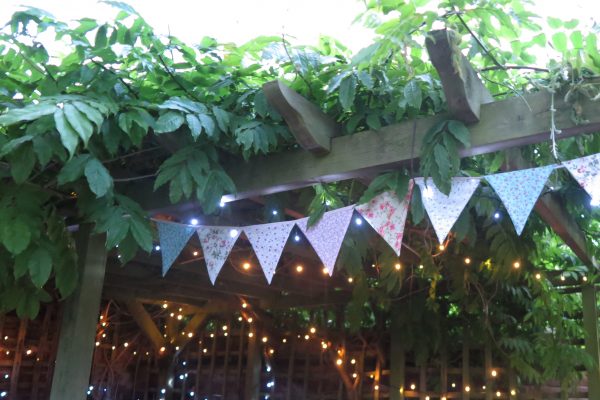
Richard set the new roof support on top of T shaped stubs made of the old wood. The wires you can see are solar fairy lights. A friend has pointed out that ‘lights need to look good in the daytime as well as when they’re lit’ so I have a little more styling to do in here.

Richard adding the five sheets of curved corrugated iron to the new roof structure. He said that it was harder to work on curved corrugated iron than straight.
The important thing is getting the first piece of corrugated iron aligned. Corrugated iron fits by overlapping one and a half corrugations, so each piece rests on the previous piece.
He used self-tapping screws with an electric screwdriver, which means that he didn’t have to drill holes for them.
How long did it take?
The work took Richard 2-3 days to complete. If you’d worked in curved corrugated iron before, it might have taken a little less time.

We enjoyed a candlelit BBQ in the new gazebo. We’re still not sure what to call it. I favour The Tin Corner. A friend tells me that Gertrude Jekyll (or possibly someone else) created a gazebo with just four columns and a roof, so that she could sit there and listen to the rain. It was called The Rain House.
The cost
The curved sheeting for the roof cost around £300. If you were costing labour, too, you’d need to add the 2-3 days work (thank you, Richard!).
Screws, brackets and the new wood cost around £60. Richard used a circular saw to cut the wood, as well as the electric screwdriver. The corrugated iron screws came with the corrugated iron, so you order those from the supplier.

And the new Tin Corner by daylight.

And we can have breakfast in the garden.
How easy is it?
Richard describes himself as ‘handy’ rather than an ‘expert DIYer’, having built a corrugated iron structure in Australia. He learned how to work with corrugated iron from YouTube.
The end result….
We’ve eaten outside every night since. It has rained – extensively – and our cushions stayed dry. However, it’s worth noting that we haven’t put guttering on. Where the rain falls on the soil, it’s absorbed. However, on one side of the gazebo, the rain falls on the stone floor. That splashes quite a bit, so that side does get a bit wet.

Vintage folding chairs for seating.
So I’d advise making sure that the overhang on both sides goes onto earth, rather than splashing onto stone. I’ve noticed that restaurants edge their pavement seating areas with pots and troughs – I wonder if this is to absorb water dripping from canopies rather than splashing their customers? I plan some pots and troughs…more styling ahead…
Pin this for later

The post How to turn a pergola into a simple gazebo. appeared first on The Middle-Sized Garden.
from The Middle-Sized Garden http://www.themiddlesizedgarden.co.uk/turn-pergola-simple-gazebo/
No comments:
Post a Comment