It’s Garden Show time!
Over the next few months you’ll see glorious borders bursting with colour. On TV programmes, in magazines, in professionally-run gardens…
But how can we achieve those brilliant, beautiful borders in our own gardens?

A show garden border. Hard to match such casually thrown-together perfection at home.
I’m re-planting a border from scratch here in the Middlesized Garden. So I’ve been picking the brains of professional gardeners.
This is what you need to know:
-
Show gardens aren’t real
They’re there to give you ideas and inspiration, not for you to copy. Show garden borders are like the fashion pages of a magazine. They are stuffed full of plants that have been prinked and perked to perfection. Only planted for a few days at a time, they’re jammed together and treated as if they’re in intensive care. This is not real gardening. It’s show-time. Enjoy it.
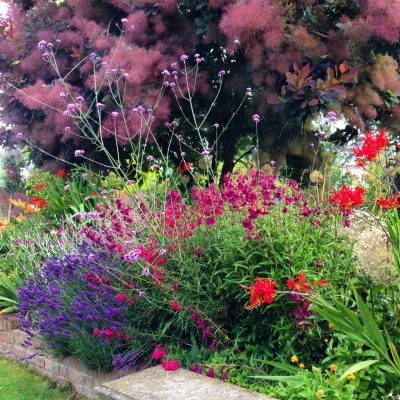
The winner of the Great British Garden challenge at Chelsea 2015 – although it’s hard to reproduce a show garden, I think this use of colour is inspiring.
2) Think about the width and density of your plant as well as the height
Borders used to be planted with the tallest plants at the back. You put towering 6ft blooms at the back and tiny 6″ flowers at the front.
Now it’s fashionable to have most of the planting at the same height.

The One Show garden at Hampton Court. Planting is more or less at the same height. But plants are airy.
Whichever you choose, you need to give your plants the space to grow sideways. If the label says that the width is ultimately 30cm, you need to make sure it has 15cm on either side before you plant its mate.
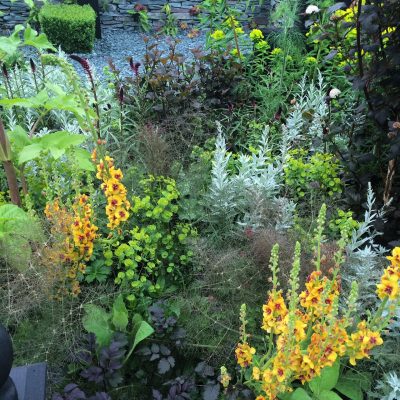
But also think about how airy or dense a plant is, before you plant. I planted some phlox in the middle of my new border, with some verbascum behind.

Planting at the Sussex Prairie Gardens. It’s airy and modern. Plants aren’t graded by height but are see-through.
‘You need the phlox towards the back,’ said garden consultant Posy Gentles. ‘It’s a very dense plant. Whereas the verbascum is a bit taller but it’s airy so you can see through it.’
Now I know why I never felt my penstemons looked right. They were no higher than the plants around them, but they sat in a solid chunk. They didn’t flow into the planting around them. I think I’d have liked them more if they’d been on the middle or at the back, rather than looming over the front and blocking everything behind them.
The penstemons (dark pink, centre) were too chunky at the front of my border.
But you don’t find anything out about plant density on the label. If you buy your plants from a nursery, you should be able to find someone who knows about horticulture who will help you.
Or Google ‘plant name + images)’. Some of the pictures will show the whole plant.
3) Many perennials take a year to get to their best
I’ve often bought plants from a nursery or garden centre, then been disappointed with their performance. But many herbaceous perennials won’t look their best the year you plant them.
They’ll be better next year. After that they’ll go on looking good for a few years.
My acanthus mollis ‘rue Ledan’, for example, has taken three years to find its feet, but it looks as if it’s going to be lovely this year.

I planted an acanthus mollis Rue Ledan (the all-white one) in front of this statue two years ago, but it’s just been a clump of leaves. I think it will flower this summer. The foxgloves have kept the interest going while the acanthus finds its feet.
4) So fill your gaps with border annuals.
There’s a huge amount of snobbery about common annuals for borders.
But there are lots of attractive plants that will plump up your borders while the perennials get established. Posy thinks we should look at begonias again, and a massed planting of cosmos always looks fabulous.

Massed cosmos annual planting in the Sunk Garden at Doddington Place Gardens
Cosmos, antirhinums, nicotiana, gazania, zinnias….annuals are rather colourful. Most also come in white.

Zinnias are a useful and reliable annual.
5) Don’t have too many different types of plants
This tip comes from horticultural and landscaping expert Matt Jackson. ‘Sticking to just six types of plants in a border can look very good,’ he says.
It’s very difficult to stick to six, but the main point is that drifts or clumps with lots of the same kind of plants are more effective than planting just one or two of each plant.
‘Plant in threes or fives’ is the standard garden advice. Professional gardener Stephanie Wolfe has a pragmatic attitude: ‘I often plant in fours and sixes,’ she says. ‘Because one usually dies.’
6) Look at leaf colour and shape as well as flowers
There’s more about this here, and also on this video.
7) Boring but necessary
You need to soak the plants in water in a bucket (or the sink) before planting them.
Arrange your plants (still in their pots) in the border in the pattern you intend to plant them. Change around until you get the effect you want (although that’s more difficult when they are still relatively small).

These plants are all still in their pots. This is the point at which Posy warned me not to have the phlox in front of the verbascum, so I swapped them round.
Dig a hole that is larger than their roots.
Garden author and expert Sarah Raven teases out the roots of plants – or even tears a few tendrils away – so that the plant doesn’t go in with all the roots curling round in its pot shape.
Add some compost or fertiliser. See my post on fertiliser here for more information, but essentially, professional gardeners look after their soil and – in their crowded borders – they fertilise. And if you’re filling gaps between your perennials with annuals, then they’ll be growing fast and needing extra.
Water well until plants are established.
8) And the consequence is…
I’ve planted up the bed with white foxgloves, yarrow, verbascum and phlox. There are proper spaces between each plant. I have fertilised and I will water. And I shall fill the spaces between with some dill that I planted from seed.
What could possibly go wrong?
I’ll let you know. Join us every Sunday morning on the Middlesized Garden – just add your email to the box on the top right, and we will fly into your in-box when the sun comes up. And do share this, using the buttons below – thank you!
from The Middle-Sized Garden http://www.themiddlesizedgarden.co.uk/how-to-plant-a-border-like-a-pro/
No comments:
Post a Comment